We have had some absence in our group and have only just started putting some ideas together, which we are not sure everyone will agree on. Here two of the group (Abbel and Alice) have presented some initial ideas to see if the remaining group members will agree this is a good route to go or maybe we will have to think of something else.
Wednesday, 31 October 2012
Practice Film Sequence
We were asked to film a sequence from a murder mystery style film. We filmed the minute leading up to the murder. This gave us the chance to look at some of the things we will have to consider in our coursework - establishing atmosphere and character, continuity editing etc. We made a lot of mistakes doing this and hopefully we can learn from them for the real coursework.
Evaluating of Murder Scenes
Planning and storyboarding
As a group we took a lot of time to plan the plot of our murder and then made sure we made a clear storyboard to follow. This was useful when it came to the actual filming of the scenes because we had a clear guide to steer us. When planning the story board we noted down the camera angles we were going to use and made a note of the locations we were going to use around school so we knew where to go.
However, due to the amount of time we had to film and the number of actors we had to use, we were unable to film all of the scenes we wanted too, leaving a few gaps in the story line meaning the full extent of our original story was not able to be fully understood.
Selecting shots and angles
When it came to decide on shots and angles we had a rough idea of what we wanted to do from the planning of our storyboard but we found that as we progressed we wanted to experiment with different angles to gain the best and most effective shot. We began setting our scene by lockers to show that our story was set with in a school and used a mid shot whilst panning the camera to the right bringing in to the frame our main character.
The next shot was filmed from within the locker our main character was looking in and this different kind of angle created an interesting perspective. Next we decided to film a flash back (See editing and mise-en-scene),using a long shot to create distance from the characters and the audience giving the impression that the undertakings going on within the story were secretive and suspect. These two shots were interesting and something that I would be interesting in including within future coursework to create the same effects.
We then filmed with the camera hand-held, filming our main characters running feet from the front and back and his face from below. These shots and angles would need work on in the future because the quality of the film rerecorded was poor due to the difficulty of trying to capture and run at the same time. The angle from his face beneath was interesting and unconventional but would too need more work on to improve the quality of what was recorded.
In another effective shot we managed to achieve on a small level the transition from a close up to a mid-shot, going from deep focus to shallow focus. The shot again would need work in the future but the idea of the shot gave a different perspective in stead of a standard close up to mid shot created through editing.
Editing decisions
We knew before we began editing that we had been unable to film all that we needed to make a story make complete sense. As a consequence one of the major problems came from when we ended up with a ‘double hug’. There need to be a filmed sequence in-between with possibly some dialogue to fill the gap instead of jumping from one hug, between the main character and the love interest, and the hug where she kills him. This meant the plot of the story was lost slightly.
The first set of clips that we filmed from the beginning locker scene to the last locker scene all fitted well together when it came to the editing. The only problem was that where we had filmed a flash back it would have been useful if we could have used some kind of effects to make this clear, instead of having the clips roll continuously.
There was also a slight lack of continuity when it came to putting some scenes together; this however came from the lack of time we had so we were unable to film so that they flowed properly. The editing of the footage filmed of the actual murder was also poor as it cut away to quickly and should have stayed on longer; effects were added here (fade away) to try and over come this but the editing needed to be more precise.
Use of mise-en-scene
The setting of out story had all been planned when making the storyboard so we knew where to go and we had made a good choice for were the murder should take place. However the setting for where he was running lacked continuity because he ran over the same stretch of land for the filming of the front and back of his feet. This meant that you did not fully appreciate what he was doing.
We could have also improved on our costume but we made do by bringing in simple hoodies to create the illusion of teenage gangs. We could have also improved our story by getting people who felt more confident when acting so the story seemed more realistic. We also did not really pay much attention to lighting that meant some of our scenes were quite dark and some detail was lost. In the future we would improve this and use 3 point lighting to gain better effect.
Another thing I would have liked to improve on it to film with a filter. This would have been particularly effective and would have meant the flash back fitted more. I would have used a dark filter to help emphasize the dark and secretive means of one gang member giving a knife to a new gang member.
Overall I was happy with what we were able to film and edit but in the future I now know we need to work faster to make sure our story flows and makes sense.
Practice Sequence from a Film
We were given the task of filming a sequence of events leading up to a murder. This gave us a chance to practise planning and storyboarding a continuous film sequence, and also filming and editing it together. We did not have much time to prepare, but we learned a lot from doing this.
Planning & Storyboarding
Acting
Selecting shots & angles
Use of Camera/Tripod
Use of Sound
Lighting/Location
Editing Decisions
The actual scene of Ellen killing Wise did not look effective because of how close up it was so we faded it out which I thought proved effective as it then left the murder to the imagination of the audience and left out the gruesome details.
Working in Groups
Planning & Storyboarding
It took us a while to figure out the starting point of our scene and knowing when to make a new a shot, especially with ensuring that our finishing photo was the ending. We did stick to the storyboard regardless of this though, the only changes were minor such as swapping a scene with another one but every scene was more or less accurate to what we had planned.
Acting
Ellen and Wise were the main characters in the scene with Ellen being the murdered and Wise the victim. The majority of the acting was very convincing, I thought, as they carried out their parts accurately. Although, there was room for improvement such as; not smirking when trying to be serious or possibly having more expression when needed too, for example when Wise saw the murder weapon (spade) for the first time. These particular points are easily improved however, so overall I think the actresses acted a convincing murder scene.
Selecting shots & angles
The scene began with an establishing shot of Wise, the main character, walking through the alleyway in which she encounters her murderer for the first time. I believed this to be an effective starting point as it gave the audience a sense of her surroundings so they can relate to why the murdering was likely to have taken place (stereotypical of alleyway’s to provoke danger.)
We then continued to use a variety of shots, such as point of view when both the murderer and victim were running. This was intended to show the intensity of that particular part of the scene which I thought it did as you could also hear Wise breathing heavily to emphasise how frightened she was.
One shot I would have added however was a close up of Wise’s face just as she discovered the murder weapon propped against the wall she hid behind. This would have highlighted the realisation on Wise’s face as she knew that would be why she dies, which would have given the audience that sudden realisation as well.
Use of Camera/Tripod
The tripod was often an issue as it wobbled when it wasn’t on completely flat surface (which was the case for the majority of shooting the scene because of the school paving.) Not only was the flooring an issue, finding the lengths for the legs to match and remain steady was a problem as it meant the shots were disrupted making the quality poor.
The camera itself only had one fault which was the play button as it was very temperamental making it hard to view the scenes straight away prolonging the actual shooting. It also overwrote a particular scene of Wise coming to a dead end towards the end; this was particularly unfortunate as that scene was one of the best. Other than this, both pieces of equipment were easily manageable.
The camera itself only had one fault which was the play button as it was very temperamental making it hard to view the scenes straight away prolonging the actual shooting. It also overwrote a particular scene of Wise coming to a dead end towards the end; this was particularly unfortunate as that scene was one of the best. Other than this, both pieces of equipment were easily manageable.
Use of Sound
We used both diegetic and non-diegetic sounds in the scene.
I thought that the most effective diegetic sound we used in the piece was when Ellen dragged the spade along behind the wall. It is a horrible noise but sounded eerie and dangerous which foreshadowed Wise’s eventual death.
The non-diegetic sound (the backing track) was particularly effective as it linked with their footing; once sped up or down where appropriate though. Stopping the sound when Ellen raised the spade added emphasis and imagination to Wise’s death as the audience did not see it but could easily have seen what had happened.
Lighting/Location
Unfortunately, the lighting was a problem because of the time of day. The scene would have had a lot more effect if it had been darker to give it a more spooky edge to it considering the events of being murdered down an alleyway. I wasn’t too worried about this though as it was essentially out of our hands.
The location itself fitted in well with the finishing shot we planned our scene around as there were many alley type areas in the school to choose from. It was better with Ellen appearing from behind her as well as it made the whole situation seem creepier.
The location itself fitted in well with the finishing shot we planned our scene around as there were many alley type areas in the school to choose from. It was better with Ellen appearing from behind her as well as it made the whole situation seem creepier.
Editing Decisions
Watching the scene back I felt that some of the shots looked unprofessional in the way they were connected to each other, for example, it changed very suddenly when Wise was running from Ellen which made it look unrealistic.
A controversial decision with editing was the added effects to the point of view scenes. At first the blinking effect seemed effective as we were seeing from the murderer’s eyes (which obviously blink) but upon watching it back it occurred to me that it could have been slightly sickly. I think that the blurred effect on the victims behalf was a realistic choice however as Wise would have been deliriously running away from the person trying to kill her which would have made her not be thinking straight.
A controversial decision with editing was the added effects to the point of view scenes. At first the blinking effect seemed effective as we were seeing from the murderer’s eyes (which obviously blink) but upon watching it back it occurred to me that it could have been slightly sickly. I think that the blurred effect on the victims behalf was a realistic choice however as Wise would have been deliriously running away from the person trying to kill her which would have made her not be thinking straight.
The actual scene of Ellen killing Wise did not look effective because of how close up it was so we faded it out which I thought proved effective as it then left the murder to the imagination of the audience and left out the gruesome details.
Working in Groups
I enjoyed working with my group as everyone was equally respected and listened to. Although some ideas were not used, it was only because adaptions were made, nobody’s ideas were completely ruled out because none were inappropriate or unnecessary.
Overall, I am pleased with the finishing product, considering it was a first experience as well.
Practise Sequence from a Film
Here is the murder sequence we filmed as preparation for our coursework and my evaluation:
E diting: This was yet another enjoyable area of our task but it was also time consuming. During editing I found cross cutting really hard due to the number of different camera shots we had, so to cross cut between the shots was hard. Also the program was new to me, so getting used to the interface was another hurdle we had while editing. But these problems can be easily solved with a bit more practise.
Planning and story boarding: This was my favourite part of the task. This was mainly because as team we were able to process all our ideas together and put it on paper, we were all especially happy with the quality of our communication as a team. The factor about the planning I didn’t particularly enjoy was the drawing, I am a terrible drawer and our plans would have been better if someone else had drawn it instead of me. One of the other difficulty we faced as a group during planning was finding the right person for the character in our murder sequel, so next while picking our groups, this must be considered.
To improve our story boards, I would like to approach it using a mind map, as we can add a lot more detail and drawing into it, which will help us with our tasks more effectively. Also I think next time while planning I would spent lot more time on the planning, because then we have a steady guideline to follow, which will help with time consumption.
Acting: Most of the acting in our murder sequel was done well and this helped our film become more realistic. Due to the fact that this was our first time, acting and filming, most people had the tendency to look at the camera, this caused many retakes, but in the end it was tackled. These slight errors have to be corrected when we are filming our actual coursework to give it more realistic and professional finish.
One thing that was very successful while acting in groups was the cooperation among each other, this was a key factor when it came to deciding who should play which characters.
While making our sequence, we had a lack of actors so we had to improvise by asking our friends who were not part of the media studies to step in. Even though many in our group viewed it to be a risk, at the end it paid off.
Next time we need to improve on assigning characters to people and make up dialogue during our planning period.
Camera angles: Deciding on camera angles was one of my favourite parts while doing the tasks because I was the camera man. When it came to filming our sequel, we tried to put in as many different typed of camera angles as possible, to impress. But this was a big task when it came to editing as it was very hard to cross cut between shots to achieve what we had in mind while filming. In our murder sequel we used, point of view shots, we applied the rule of thirds, foreground and background shots as well. Overall, our use of camera angles was successful because we managed to capture everything we had in mind and more.
We could improve our camera usage next time, by reducing the numerous amount of camera angles and concentrating and giving significance to a few and making them perfect.
One of the problems we faced during filming was when we did the POV shot, the camera was very difficult to handle and it too unsteady. But this could be improved by practising the type of shots or using a method or a different technique.
One thing I would improve next time, would be adding more special effects, because special effects could have made our murder sequel a bit more professional and realistic. I would also add blank shots to show time passage.
Overall I think it could have been better.
Use of mise-en-scene: I was quite pleased with our choice of location and setting. It suited our story line well. Because the location we had in mind was a secluded are area, the school during lesson time fits that perfectly.
We didn’t plan our props during our initial stages; this would have to be improved next time around. We also didn’t plan any costumes, if we had costumes it would have been better and would have given it a more pro and authentic outlook. All our actors looked like school kids instead of a drug dealer and nerd.
Use of sound: We didn’t have a soundtrack at the beginning of our murder sequel, the music only starts after the action kicks in. This gave it a fast paced feel, when watching it. The music we chose was quite fast paced, this was because our film was also very fast paced, so they both went together very well.
Overall, I think our murder sequel turned out successful and I was really satisfied with it, because it was our first time in filming, acting and it was very good for a first time. Next time, I would spent more time in planning and story boarding as it would make it easier while making it. I would also plan about props and costumes more to give it an authentic outlook. I will also try and choose the actors and spent more time on editing.
Analysing Opening Sequences - Casino Royale
Scene Summaries- Casino Royale
The film begins with an establishing shot of a large building at a low angle, this shows the large scale of the building and highlights its importance. A title is also shown to help further establish where the opening scenes are set and this is in ‘Prague, Czech Republic’. All of the opening minutes are shot in black and white and doing this helps create a sinister and mysterious feel. A car then pulls up and a man steps out and is show, again through a low angle. This suggests the man shown has a lot of power and will be a dominant figure throughput the rest of the film, as it too is a film for the ‘James Bond’ series, the early close up suggests that he is going to be a ‘bond villain’. In then cuts to another incredibly low camera angles that shows of well the scale of the building the man is entering; the lift of the building scales the building upwards and it cuts it cuts this time to a high camera angle and another close up of the suspected ‘bond villain’, again highlighting the fact that he is going to be and important character. The lighting achieved from using this camera creates an interesting effect as it only enables half of his face to be lit up creating a further sinister feel, the audience also get the impression that he is hiding something as having half of his face hidden suggest things being kept in the dark.
It cuts to a long shot of the man walking through the building that he had entered. The long shot enables us to see all of him and a fair amount of his surroundings; from this you can see that the building looks very modern and high tech suggesting that the man is in a very modern kind of business. The man then walk in to a room that is established as his office and he stops suddenly and a close up of an open safe is show to highlight it as significant. A close up of the man’s face is shown and from this the audience can see a clear worried and shocked expression on his face, inform them that this was not how he last left the safe. It then cuts to a mid-shot that is composed in very specific way for the audience.
The shot becomes a two shot as it is the first time that the well-known character ‘James Bond’ is shown. He is shown in deep focus over the shoulder over the suggested villain. This draws our attention to James Bonds importance and only his face is illuminated to create the effect of him hiding in the shadows and keeping a low profile at this point. He is also the first person to use dialogue in the film which draws the attention to him as being the most important character and it cuts forward to a close up of him to further this point. As the unknown man sits down at his desk he opens a drawer and an extreme close up of a gun is show with the lighting tacitly placed to draw your attention to it; this shot infers that James Bond is soon to be in danger at the hands of the suspected villain.
It then cuts to another tacitly composed mid shot/two shot. Both men are placed at complete opposite edges of the frame to show a clear distance between them and no friendly interaction whilst the two shot suggests them being forced together, which is proven as James Bond has clearly broken an entry in to this man office from his dialogue.
The film then back tracks to a flash back of James Bond fighting with someone who was an ally of the unknown man, again told to the audience by their sparse, cold dialogue. This flash back is shown clearly as the black and white contrast changes significantly to show a change in time. The present day is shown in ‘dark’ black and white with dark and shadowy lighting, but the flash back is show in ‘white’ black and white and everything is clearly seen. The fight scene is very face pace and a range of shots are used to demonstrate this. The slow talk and mostly silence of the conversation between Bond and the unknown man is positioned in juxtaposition with the violent turbulent fighting between Bond and the ally. The contrast too helps to highlight the urgency and the fast pace of the fight. The first shot is an over the shoulder close up shot of James Bond hitting the man and it then cuts to an aerial shot which show the fighters breaking through toilet walls, informing the audience that the fight is taking place in some kind of men’s toilets. A mid shot shows the full length if the men fighting and the ally pick up a bin to hit James bond with which is graphically matched with the next scene of the suspected bond villain, picking up the gun seen in the drawer and pointing it at James Bond. This is a graphic match as both actions threaten to harm Bond and in doing so creates a smooth but sudden link between the two unrelated scenes, positioning the audience to react and feel worried for the character.
However this worry quickly disappears as the shot changes to a close up and James Bond informs that he knew where the man kept his gun and as the trigger is pulled nothing happens. When this happened the focus changes to deep focus and the man’s face is clearly visible whilst his gun is blurred. This emphasises how his gun in powerless as Bond has taken the bullets, shown briefly in a close up.
Sound – Casino Royale
The beginning of the movie opens to silence, and the only sound heard are the diaegtic noises of natural sound e.g. cars pulling up or footsteps. Even these sounds are very limited and this helps add to the almost ‘creepy’ and sinister atmosphere and helps to build tension. When dialogue is introduced it is spoken very softly but coldly and the audience have to strain to listen to what they are saying. This captures your attention as you have to focus hard on what is going on and infers that the conversation is not the kind of conversation that you would hear on an everyday basis adding to the building tension.
In juxtaposition with this, when the flash back shows the fight there is a lot more sound present due to the ‘scuffles’ and punches thrown by each man. The destruction of the toilet walls also creates loud noises and this is in complete contrast with the earlier eerie silence. This shows the difference in the paces between the two interactions that happen with Bond and the other two characters.
Screenshots - Casino Royale
1. Low angle establishing shot- is used to set the location of the opening scene and a written title shows the exact location of ‘Prague, Czech Republic’

2. Low angle close up- This establishes the character as important and the way he is dressed shows him to be within an upper class and the hat emphasises that he is in a different country.

3. Low angle/Canted Angle- Show the sheer scale of the building and its shows off its modern features, setting the scene of a modern technology inspired movie.

4. High Angle/Close Up – Again shows the importance of this character and enables the lighting to only show one half of his face creating a sinister feel.

5. Long Shot- Help to show the full dress of the character which is smartly dressed and show an inside perspective of the setting of the building. The building is once again confirmed as high tech and modern.

6. Mid Shot/Two Shot- Shows for the first time James Bond and he appears in deep focus drawing the audience’s attention towards him.

7. Close Up- The shot holds incredible importance as it shows a gun, emphasised by the light shining directly on it, and adds drama to the story as it creates tension as it is not picked up straight away but is clearly shown.

8. Mid Shot/Two Shot- Shows the forcing together of the two characters and both are placed at complete opposite edges of the frame showing the distance and dislike held between the two men.

9. This is where the colouring of the picture changes to ‘white’ black and white and shows a clear contrast from the previous scenes so clearly shows how the time has changed from the present day to a flash back.

10. Aerial shot- gives a different perspective of the fighting and highlights the fast pace activity as it shows toilet walls being destroyed.

Analysing Opening Sequences - The Devil Wears Prada
Scene Summaries – The Devil Wears Prada
The first shot is a point of view shot of a woman looking in a mirror. The shot helps establish who the main character of the film is and we can begin to get a sense of her personality. The prop of a toothbrush, the wet hair of the character and steamed mirror, gives the impression that she is in a bathroom and it is early morning and the film is starting at the beginning of a new day, perhaps also suggesting the beginning of a new chapter in the woman’s life.

It then cuts to an aerial shot of a large city, New York and the title of the film ‘The Devil Wears Prada’ appears as word over lay. This establishing shot informs the audience that New York City is going to be the setting for the film.

Mise-en-Scene then begins to play a major role within the next shots of the opening 2 minutes. From the aerial shot it cuts to a close ups of various women putting on expensive and glamorous underwear. All of the scenes in the opening two minutes are graphically linked together allowing it to run seamlessly.

It then crosscuts to the original woman, the suggested main character, and she too is preparing to put on underwear. This graphic match links the two scenes together and this continues to happen seamlessly throughout the two minutes. However the underwear that the glamorous women are putting, on compared to the main woman, is of completely different styles. The main characters underwear is plain and looks inexpensive but the other women’s underwear looks the complete opposite. This use of juxtaposition highlights how there is two completely different types of women being shown; the high fashion glamour type and the ‘plain’ down to earth type.

A mid shot is then used to show one of the women from the first group and you can see that her styling is again high fashion and the mid shot enables us to see enough of her surroundings to see that she is standing in a posh apartment and inside a walk in wardrobe. This suggests further that she is greatly interested in high fashion and must earn a lot of money.

It then cuts to extreme close ups of women putting on their make up; there is also a close up of a drawer filled with again expensive looking make up. A woman chooses a lipstick of pinkish shade, a very feminine colour and it then cross-cuts back to the main character. In an extreme close up she is seen picking up a very simple plain coloured lip balm, another graphic match, and in a mid shot is shown putting it on. This again is juxtaposition and further highlights how the main character is not in any way interested in glamour at all which is a complete contrast to everyone else shown; these differences suggest the main character will be an outsider in whatever she goes on to do within the movie as she is being singled out from an early stage as very different to the other women shown. The mid shot too enable us to see that she does not have a walk in wardrobe and is not living in an expensive apartment which when graphically matched with an earlier shot is again in complete contrast with the woman and the surroundings shown.


More cross-cutting and graphic matches continue showing extreme close ups of women putting expensive jewelry; when it crosscuts back to the main character she however is more preoccupied with looking at various cutouts of newspaper articles through a POV shot. These articles have titles like ‘NU women take back the night’, confirming the idea that she is less interested in the stereotypical view that women love fashion and more interesting in more pressing matters.


The next most significant shot is of a close up one of the blonde glamorous women kissing a man who is asleep in her bed. In the cross cuts and is followed by the main woman kissing a man who is awake. This graphic match is again displaying juxtaposition and really shows a contrast between the two women’s personalities. Both two shots show how there is some kind of relationship and interaction between the women and the men, except the first women’s man in asleep and she kisses him on the cheek which show less affection and shows how the two are not engaging. However the second two shot shows the man present awake and he and the main woman engage with each other and they kiss on the lips suggesting there is much more affection shared between them. This is in complete contrast with the first two shot and shows again how there are two very different types of women being displayed. The men that the two women are with are very different in their appearance as well; the first man appears very clean shaven with a neat hair cut and is shirtless whilst the second man has curly messy hair and is wearing a dark t-shirt. This demonstrates how the social groups that the two types of women mix in are very different as well furthering the point that the main character would be an outsider compared to the others shown.


When it cross-cuts back the other women are leaving their apartments and this is show from a low camera angle. The mid shot enables the audience to see the posh surroundings that they are leaving and the low camera angle looking up towards the women highlights the fact they seem very powerful and are very domineering. This could create a link back to the title of the movie ’The Devil Wears Prada’, as ‘the devil’ is seen as very domineering and we know that the women are interesting in fashion, i.e. ‘Prada’ so the camera angle demonstrates how these kind of women can be intimidating summarizing the title. Again in juxtaposition with this when it cross cuts back to the main character she is viewed in a mid shot from street level, so therefore appears to be on the same ‘level’ as the audience so they can relate with her. She is also again as seen more down to earth than the other women as in the background of her mid shot in shallow focus there is a group of school children which make the shot feel less high class.


Titles and Credits – The Devil Wears Prada
There is an opening title of the company’s official logo and this is followed by another two title slide written in a specific font on a black background.


The second set of writing, reading ‘A Wendy Finerman production’, stays upon the screen but the black background is then replaced by a blurred POV shot that then becomes clear when the main character wipes the mirror.


Credits then play, in the same font as the two title slides, throughout the rest of the two minuets, appearing in various places overlaying over moving especially in shots were extreme close ups are used. The title of the movie is also shown like this over an establishing shot, linking the name of the movie with the location of where it is set. This is effective as it helps link scenes together throughout the cross cutting and helps emphasis the graphic matches by being something that is continually there throughout the opening scenes.


Use of Sound- The Devil Wear Prada
The sound motif for 20th Century Fox plays as the title runs and then the second two title slides are shown in silences and very quietly you her non-diagetic music beginning to play. It is the song ‘suddenly I see’ by KT Tunstall and the words of the lyrics seem to link to the character on the screen, making the audience feel like the artist of the song is singing about the woman on screen. The music helps to further establish the character of the women being shown, for example, the opening lyric is ‘Her face is a map of the world’ suggesting that she is a naturally inquisitive character and is interesting in discover new things. This coincides with the POV shots of her reading interesting newspaper articles. The music is also synchronous and positions the audience to feel in a happy positive mood much like that of what the main character seems to display herself. Diegetic sound is also present on top of the music and when the first shot of her wiping the mirror is show the sound of her doing so is heard. Other natural sounds are played throughout the music as well, such as the sound of her brushing her teeth, the sound of high heels and the sounds of removing clothes from the wardrobe. The only dialogue is when the man the main charter kisses calls out ‘good luck’ to her. This furthers the idea, along with starting the movie at the beginning of a new day, that she is about to start a new chapter in her life.
Analysing Opening Sequences - Hot Fuzz
Scene Summaries – Hot Fuzz
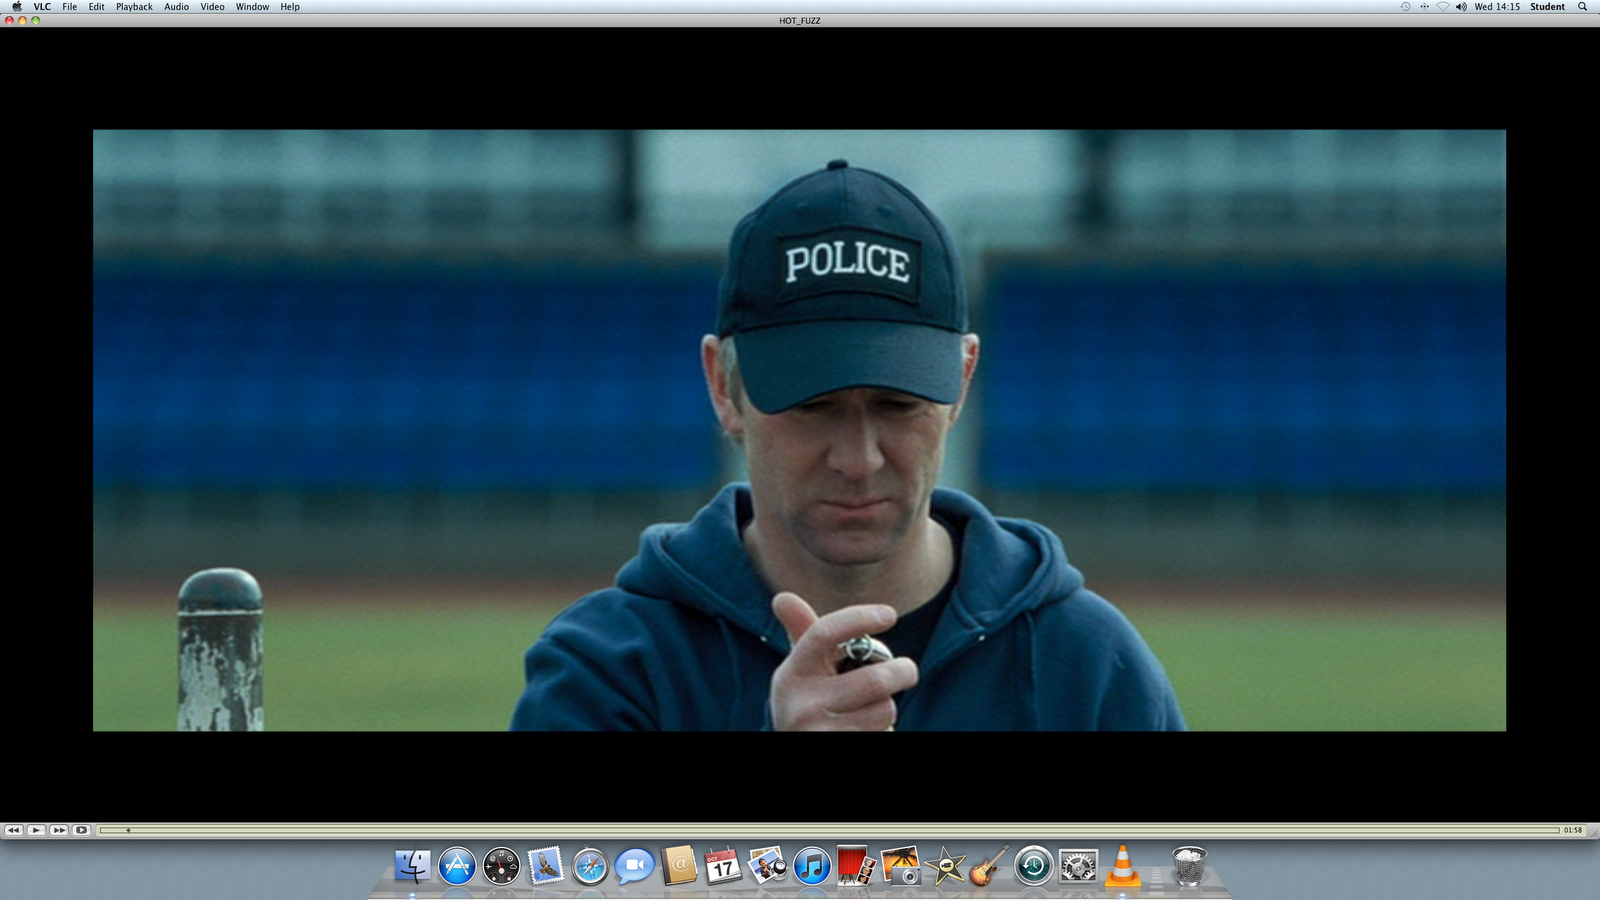
The film begins with the sound of police sirens as non-diegetic sound whilst the films titles slides play, giving an instant impression the movie is linked to the police force. There is then a long shot showing a figure in the distance marching forward in a determined way, which is also an establishing shot, showing the audience that they are inside some kind of important building. The building appears very up to date and the automatic doors shown open very early in comparison to where the figure marching is, this gives the impression that the character has a dominating presence. When the figure meets the foreground a close up is used to show their expression and an extreme close up is used to show their police badge. These shots are used to help establish who the main character is and is a clever way of informing us of whom they are and what their names is. We find out from the uniform that he is wearing and from the police badge that the main character is a police constable called ‘Nicholas Angel’. The close us of his face also enables us to see that his expression is very stern and focused and the expression is something that appears many times throughout the opening two minutes.
The shots that then follow are very swift and quick and this is to show the fast past of ‘Nicholas Angels’ life as a police constable. It first cuts to a low angle of him making him appear very dominating and then swiftly cuts to an extreme close up of his feet walking at a fast pace. The camera then cuts to a side angle of him walking and then to an extreme close up of his shoulder, to show his police number, the frame then moves to be a close up of his profile. Special effect transitions are used to edit the shots together to emphasise the fast pace movement; this fast pace suggests a reflection upon how his entire life works and moves. Another side profile shot is used in a group shot of other police officers and the focus is entirely upon his face, the camera then pans round to gain a close up of him. The expression that the camera captures is the same expression displayed in the earlier close up of his face. This graphic match links the two unrelated scenes being shown to seamlessly put together the story of his police working life that is beginning to be shown.
Sound/Titles and Credits – Hot Fuzz


The film begins with the production company’s logos and instead of playing it in silence or with the company’s sound motifs, they are played with the non-diegetic sound of police sirens. There is silence and only the sound of footsteps as a silhouette character walks forward; this being played to silence builds anticipation and draws the attention of the audience towards the character about to reveal themselves. A voice over then begins, a stern male voice, evidentially of the man on screen and he introduces himself in conjunction with the extreme close up of his police badge shown. This voice over then continues and the fast shots and, quick transitions begin and he speaks as fast as the film being played goes. His voice and the words of the voice over match the to the point character being shown in the opening sequence furthering the idea this is what his character is like. Sound effects are also played and at the same time non-diegetic music starts up and adds effect to the fast pace lifestyle being displayed on screen. The music reaches a crescendo as the character reaches the end of him police force life story and finishes as he knocks on the door of an office (played as diegetic sound).
Screenshots – Hot Fuzz
1. Longshot- shot is used to establish opening location of police headquarters and gives you the first glimpse of the main character.

2. Close up- this shot introduces and establishes the main character and the close up highlights his stern expression which is graphically matched and continually shown throughout the opening two minutes.

3. Extreme close up- this is a cleaver and to the point way of informing the audience of exactly who the main character is, Nicholas Angel, and his job. The style of this deliverance foreshadows ‘Angel’s’ character type cast.

4. All of these shots happen at various points throughout the introduction sequence for Nicholas Angel and are all graphic matches. They are matched through the exact same expression on his face which gives the audience a clear indication into his characters personality. He is clearly portrayed from these shots as a well focus and determined character and a clear perfectionist (also shown by the story line); these graphic matches link unrelated scenes to create to show his life story within the opening two minutes. The way his told in this fast pace and swift manor, demonstrates to the audience how his life attitude is too fast apace and motivated.


5. All of these close ups appear at various times throughout the opening sequence and again, are all graphic matches. The close ups show Angle clicking a pen, clicking a remote and a man clicking a timer for a race that he has taken part in. This too helps to seamlessly link all of the unrelated scenes and shows the story of Angle in one continuous sequence. It also suggests that this clicking especially of his pen, along with the determined expression on his face, with continually appear throughout the rest of the movie.


6. Throughout the whole sequence many of the shots are cut together to show a mid-shot, close up and then extreme close up. This creates the effect of a face pace and quickly moving lifestyle, led evidentially by the main character Nicholas Angel.


Subscribe to:
Posts (Atom)